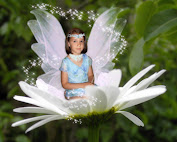
I chose to make a Victorian egg, using the sweet little angel girl, called Butterfly Kiss by The Stampsmith as the main focal image for my egg. I stamped her onto to Copic paper and then crinkled the paper all up so that it would more easily form to the egg. I stamped text onto tissue paper and then decoupaged it on. The text stamp is called, Art, Life & Beauty by Hero Arts. I distressed the entire egg with Tea Dye Distress ink by Tim Holtz. I free-handed the pearl flourish along the side, then applied a strip of pretty lace around the entire egg and bronze embellishments at the top and the bottom, finishing with a little polka dot bow at the top. I used the small Butterfly Kiss stamp, but it also comes in a large version, as well.
Lace around the egg.
Embellishment and bow on top of the egg.
Embellishment on the bottom of the egg.
Here are the eggs below that my daughter's made.
Bling Clouds, Stencilled Butterfly and Mohawk Funny Face by Alexandria Mutch, age 11.
Mohawk Funny Face and Watermelon by Natalia Mutch, age 9.
Thanks for stoppin' by! :)


.jpg)


1 comment:
Oh what fun this must have been Julie! Awesome job! One of my fav images, Butterfly Kisses!
Wishes
Debbie
Post a Comment