Sunday, May 31, 2009

Faux Brayering Technique


This is a card that I CASE'd off my friend, Yvonne Balmer. Thanks for the idea, Yvonne! I was chatting with her about this card that I was asked to make for another co-worker of mine. The card was supposed to take care of three occasions. The wife's birthday, the husband and wife's anniversary and thirdly the husband's birthday which all happen a few days apart. I'm honored that she asked me, but you can see my challenge with coming up with a sketch idea. I said, so you don't want anything too frilly or girly looking and my co-worker said that it really didn't matter if it was, that he wouldn't mind. So, here goes. I hope they like it! :)

Here's an angle to show the dimension of the card.
I love this Serengetti tree stamp by Stampendous and I think it gives a masculine look to the card and the colours and scalloped diamond edge give it more daintiness. For a faux brayered technique, I used a sponge dauber with inks to apply the different background layers for the tree image. Go lightly at first with your daubers and apply more ink until you reach the desired look you want.

Ok, it's nearly midnight, time to call it a day. I'll be back tomorrow with more cards to show you.

Thanks for stoppin' by! :)
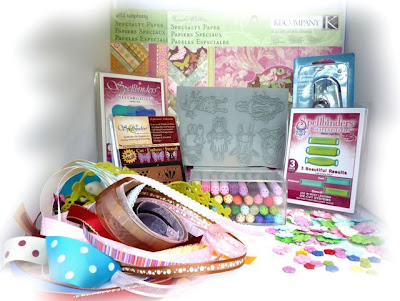
Supplies:
Stamps: Serengetti Tree (Stampendous)

Cardstock: China Red Linen (CRS), Flat Black (CRS), Groovy Guava (SU), Ivory (Staples) Ink: VersaMark (Tsukineko), Certainly Celery (SU), Barely Banana (SU), Apricot Appeal (SU), Cameo Coral (SU), Mellow Moss (SU)
Tools: Scallop Diamond Punch (EK Success), Sponge Daubers (SU), 1/8" Dimensional Squares (EK Success), Midnight Black Embossing Powder (Stampendous), Embossing Buddy (SU), Embossing Tray, Paper Piercer, Piercing Mat, Piercing Guide (Creative Memories)
Embellishments: Gradient Red Ribbon (Michaels)

Friday, May 29, 2009

Bridal Shower Book Card

The sister of one of my co-workers is having her Bridal Shower next month and my co-worker asked me if I would make her sister up a card like the one I made a few posts back, but using her wedding colours of chocolate brown and cream. I'm honored that she asked me.

This is a fun little project to do and I tried a new technique with it tonight. For the card that I made the other day, Deborah had given us all a little silver foil heart embellishment. But, I didn't have any more of these, so instead of going out and trying to find some more, I decided to make one of my own. To do this, I stuck aluminum foil tape onto a piece of cardstock and then free hand cut out a heart. I ran it through the Cuttlebug using my Paisley folder. Then, I adhered the foil embossed heart to a piece of chocolate brown cardstock and cut around it again to make a mat layer for it. It just seemed to plain on it's own. I kinda like how it turned out, I think I'll have fun playing around with my foil tape... lol :)

Here's an angle to show the dimension of the book. With the two chipboard layers, it's about 1/4" thick.

This is the inside of the book card.

This is the back and front of the book card.

I'll be back soon with something else to share with you. Stay tuned...

Thanks for stoppin' by! :)

Supplies:
Stamps: Wedding (Inkadinkado), Calligraphy Sentiment (QuietFire Designs)

Cardstock: Cream (Ivory), Chocolate Brown (CRS)

Patterned Paper: Au Chocolat (SU)

Tools: Classic Circle and Scalloped Circle Nestabilities (Spellbinders), Cuttlebug, Textile Texture Embossing Folder (ProvoCraft), Paisley Embossing Folder
(ProvoCraft), Scissors, Aluminum Foil Tape (Henkel), chipboard, Terrifically Tacky Tape (ProvoCraft)
Embellishments: Brown Satin Ribbon (Michaels)

Thursday, May 28, 2009

Four Seasons Waterfall Card and a Tutorial


I was asked by a co-worker if I would make her a couple of these waterfall cards, so along with making them, I opted to throw together a quick tutorial on how to make these fun-fold cards in case you'd like to give one a try. Here goes:

Cut a standard A2 Style Base Layer (Blue Bayou) - 8 1/2" x 5 1/2" and fold in half.
and a layer to put on top (River Rock) - 4" x 5 1/4"

Now, cut the following pieces of cardstock from more Blue Bayou cardstock:
4 - 2" x 2" (4) - These are for your mat layer for your stamped images.
9" x 2" (1) - This is for your waterfall piece that you attach your images to.
3/4" x 4" (1) - This is the strip at the bottom to pull your waterfall piece through.

Now, you'll need some ivory cardstock measuring 1 7/8" x 1 7/8" (4) to stamp your images onto.

Colour in all your images (that's the most time consuming process of this card) and add some Stickles for the snowman and snow on the ground. I let the Stickles dry overnight and then assembled them onto the blue pieces of cardstock.

These are the four seasons images all watercoloured.

The Spring image is on the top, pull the tab to start the waterfall and reveal the Summer image.

Keep pulling the tab and the waterfall effect continues to reveal the Autumn image.

When you pull the tab out fully, you reveal the final Winter image.

Here's a close up of the sentiment.

To see a full tutorial on how to assemble this card, I followed this tutorial.

Thanks for stoppin' by! :)

Supplies:
Stamps: A Tree for all Seasons (SU)
, Curvy Verses (SU)
Cardstock: Blue Bayou (SU), River Rock (SU), Ivory (Staples)

Ink: Jet Black (StazOn), Creamy Caramel (SU), Old Olive (SU), Really Rust (SU), Ruby Red (SU), More Mustard (SU), Close to Cocoa (SU)

Watercolor Wonder Crayons (SU): Brocade Blue, Night of Navy, Always Artichoke, So Saffron, Regal Rose, Rose Red

Tools:
Thumb Tack (to poke holes for brads), Terrifically Tacky Tape (ProvoCraft)
Embellishments: Antique Brass Brads and Hodge Podge Hardware (SU), Diamond Stickles (Ranger)

Friday, May 22, 2009

A gorgeous day

I promise this will be my last post for the day! Apparently, I'm making up for lost time with 4 posts in one day! lol :)

After all the rain we've had lately, I just had to share with you all the gorgeous day that we're having here today. I crafted the morning away down in my basement rec room and then decided it was time to head up stairs to grab a bit to eat for lunch before it was time to go get the kids at school. When I went upstairs I looked at the temperature and it was +37.3C!!! That's +99 degrees Fahrenheit! Holy cow! What a beautiful day, Spring/Summer is finally here! :)

Well, I have to go cook some supper, just wanted to brag about the weather! lol :) Hope you're all having a great day and enjoying some great weather, too!

Thanks for stoppin' by! :)

Wedding Book Card

This was supposed to be our 2nd project for the night on Tuesday, but we all took so much time fussing with our Shadow Box Frame cards that we ran out of time...well, that and we had to take time to eat the yummy chocolately goodness treats that Kim and Deborah brought! lol :)

When you untie the bow, this is what the little book card looks like when it's opened up.

Deborah had already done up little kits for us all with the supplies needed to make these cute little books, we just had to assemble them and embellish as we wished. She also gave us the stamp from QuietFire Designs that I used on the inside of the card. Kim and Deborah are both on the design team and Suzanne at QuietFire also gave us all a little thank you for getting together and having fun with their products. We all love QuietFire stamps, please check them out for yourself, Suzanne's calligraphy is out of this world! Just gorgeous!
You can't see it, but there's also two layers of kraft cardstock between the patterned paper and cardstock layers to give the book extra strength. You attach the ribbon with double sided tape between the kraft cardstock layers and then embellish as you wish.

This shows the front and back of the book card.

This was such a fun project to do, thanks so much to Deborah for the inspiration! :)

Thanks for stoppin' by! :)

Swap card by Catherine


Yes, this is shocking, I know, considering how 'absent from Blogland' I've been lately! But, I have somethings else to post today, this is the beautiful card that Catherine Levy made for our 'Wonderful Woman' swap on Tuesday night. I drew Catherine's name, so I got to take her creation home. :) Sorry this isn't the best picture, it really is lovely, I'm just having trouble getting a proper shot of the black scalloped layer against the dark patterned paper. I love that Bo Bunny paper, isn't it gorgeous? I can't get enough of their paper! lol :)

I'm working on a little project today, I'll try to post it later on today. Stay tuned...

Thanks for stoppin' by! :)

Birthday Card from Kim and Val


I got a couple of early birthday cards from my friends, Kim and Val. They're both proudly displayed in my crafty space. I love them both, thanks so much to both of you! :)

Look at the gorgeous card above by Val Wilson. I love the colours and OMG look at that butterfly! It's funny, I just called a local lss the other day and tried to get them to put the stamp set aside that Val used on her card. Just look at that gorgeous butterfly. Can you see all the faeries within it? I absolutely love this whole set. Inkadinkado has definitely outdone themselves! Now, I just have to wait 'til they get their next order in...I'm counting the days! lol :)
Now, check out this stunning card by Kim Prince. Could Audrey Hepburn be any more beautiful? Can you believe that's a stamp, too? Kim has some of the most beautiful photo stamps from The Stampsmith and our crafty group has declared Kim as the Canadian Queen of Photo Stamps! This is such an elegant card, I just love it! Thanks again, so much, Kim! :)

Thanks again, so much ladies for thinking of me. The three of us actually all celebrate our birthdays next month - all within a week! There's so many Gemini's in the group, it's no wonder we all get along so well! We've opted to do a swap for our next get-together, and we're also doing a card mingle to be mailed in the meantime. But, instead of having a crafty night next month, we're going out for Thai food. Yum! Yum! It also happens that there's a M's just around the corner, as well, so we might pop in to see what deals they have on for the hard core crafty addicts! lol :)

Thanks for stoppin' by! :)

Thursday, May 21, 2009

Mystical Dreams


I had some time tonight to tinker with this card and finish it off. This is the shadow box card that Kim brought the pattern for us to do at our crafty get-together on Tuesday night. Thanks so much to Kim for the pattern. I've been wanting to do one of these cards for a long time now and finally got to make one! Isn't it funny how you have so many different things on your list of things to try and keep thinking you'll get around to it, but never do. Anyway, I'll be making more of this style of card now that I see how fun and easy they are to make.

Here's a bit of an angle to show you the shadow box frame of the card.

I borrowed this Indian Princess and unicorn stamp from Kim, as well. I can hardly wait 'til my girls see this card in the morning - they're crazy over unicorns and horses and I know they'll love this stamp. Thanks again, Kim, for letting me borrow it. If anyone knows who makes this stamp, could you please drop me a comment to let me know. I'd love to get it, too. :)

Here's another view of the card when the front of the frame is flipped over, so this shows the back of the frame.
Well, I think I'll call it a day, I'll be back tomorrow to show you some more cards...stay tuned.

Thanks for stoppin' by! :)

Supplies:
Stamps: Flourishes (Inkadinkado), Dreams - Scrapbook Sentiments (Inkadinkado), Let your dreams find wings (Impression Obsession)

Cardstock: Whisper White (SU)
Ink: Chocolate Chip, Close to Cocoa, Creamy Caramel (SU), Vanilla (Hero Arts), Timber Brown (StazOn), Tea Dye Distress Ink (Tim Holtz)
Watercolour Crayons: Always Artichoke, So Saffron, Bravo Burgundy, Regal Rose (SU)

Tools: AquaPainter (SU), Sponge (SU)

Embellishments: Scattered Straw Distress Stickles (Tim Holtz)

Tuesday, May 19, 2009

'Wonderful Woman' theme card swap


The theme for our crafty night this time around is any card that incorporates a 'Woman' into it. I don't really have any stamps that are just a woman, so I opted to go with a fairy woman. I hope I'm still within the guidelines for the card swap. I think it'll be fine, we're a pretty laid back group and really just love to get together to spend a fun evening together and have lots of laughs. I'm really looking forward to the night out and I know most of the other ladies are too. We certainly had some laughs tonight and some crazy conversation. Kim had a great project for us to do, I'll post it as soon as I'm done...just a few more things to finish on it.

Here's an angle of my swap card to show the dimension in the card.

I treated myself to this scallop diamond edger punch at M's using a 50% off coupon that I happened to have from another recent trip there. I've been wanting this punch for a while now and I really like it. I like the detail of the little diamonds at the peaks of the scallops. And, the fact that I got to use a 50% off coupon justified me getting more things, too, using another coupon, of course, but in a separate order. Gotta love a bargain, eh? lol :)

I have a few cards to show you, but they'll have to wait...it's too late and I need to call it a day, so stay tuned.

Thanks for stoppin' by! :)

Supplies:
Stamps: Fairy & Enchanted - Kolette Hall (Studio G)Cardstock: Blue Bayou (SU), Chocolate Brown (CRS), Ivory (Staples)
Patterned Paper: Autumnal Winds Speaks, Tiki Shack Scatter Stripe & Old School Writing Paper (all from Recess at Carson Dellosa)
Ink: Vintage Sepia (VersaFine), Timber Brown (StazOn),
Touch Markers - Cream (36), Deep Yellow (32), Pale Baby Blue (144), Blush (136)
Tools: Scalloped Border Punch (SU), Scallop Diamond Edger Punch (EK Success), Sea Sponge (SU), 2 Way Glue - Squeeze & Roll (EK Success), 1/8" Dimensional Squares (EK Success)
Embellishments: Light Brown Dew Drops (The Robin's Nest), Peeled Paint (Green colour) & Scattered Straw (Yellow colour) Distress Stickles (Tim Holtz)

Sunday, May 17, 2009

I got a new computer

Sorry I've been MIA again for a bit. In amongst working, I got a new computer, so I've been setting it up. It's now located at my crafty space and I love it here! I had to clean up my old computer for the kids to use now for their games, but I still have to reinstall everything back onto my new one...lots of work. I don't have my bookmarks on my new one yet, so I'm feeling rather lost, but I'll get them moved over tomorrow. I'm also still using my server's web mail and I really don't like it, can't wait to get Thunderbird (email program by Mozilla) re-installed and get that going again, so I can have all my email addy's again, too.

Anyway, I did make a card tonight, but I can't show it to you quite yet. I'll post it on Tuesday night as it's for a get together that night with some friends for a swap that we're doing. I'm really looking forward to seeing everyone again as it seems like forever since we've all had a chance to get together for a crafty night. We always have a great time sharing ideas with lots of laughs. It's such a great bunch of ladies. I'm so glad to have met them all!

Two of my co-workers have asked me to make a few cards for them, plus I have a zillion birthday cards to make in the next week or so, so I'm gonna be busy. Seems like a lot of my friends, like myself, all celebrate our birthday in the next month. Mine is on the 10th of June - I'll be turning the big 35, so we'll have to celebrate with an extra slice of cake. That extra piece doesn't count when it's your birthday, you know! lol :) So, stay tuned to see some cards soon...

Thanks for stoppin' by! :)

Wednesday, May 13, 2009

Blog Candy Alert


Debbie's celebrating her birthday by offering up some very yummy looking blog candy! Pop on over to Passion for Crafts with your best wishes and enter for your chance to win some new crafty goodies! Candy closes on May 23rd.

Good luck! :)

A day of pampering


I had today off work so I decided to pamper myself and go to the hair salon. I got three inches cut off my hair and I got my hair toned and highlighted. I think if I won the lottery I'd install a salon i my home and have a personal stylist come and do my hair everyday! Is there anything better than having people do your hair for you? lol :)

You can't really see the red highlights in the picture above, so here's another shot to show you. I had to laugh, they're a guy that's one of the stylists at the salon and he saw my hair and said, "Wow, that looks fierce! It's gorgeous!" He's gay, so he wasn't flirting, but I still felt all giggly inside! It's nice to get compliments and I'll take any that anyone wants to give. Especially seeing as how I'll be 35 years old next month! I'm not a spring chicken anymore... lol :)
Hopefully I'll have another card to show you tomorrow. Sorry I've been short on them lately but things have been busy around here. But, I do have a ton of cards to make for upcoming occasions, so I'll have lots to show you soon. Stay tuned...

Thanks for stoppin' by! :)

Sunday, May 10, 2009

A Wonderful Mother's Day


Hope all the Mother's out there had a wonderful Mother's Day today. I woke up to breakfast in bed...quite a yummy smorgasbord! :) And of course crafty cards and artwork from my precious girls! They're such sweethearts!

We drove to the Valley this afternoon to visit my Mum and Dad. We had a nice visit with them and got back home at 9 pm tonight. I'm sure the girls will be sleepy in the morning, but they were so happy to see their grandparents again. It's crazy how we only live an hour drive away but hardly see each other. Time just seems to fly by and we all get into our own routines. We just need to make the time, I guess!

Well, it's time to call it a day, but I just wanted to share a pic of this card that I made for my Mum. It's the same as this card that the made the other night for my Mother-in-Law, except that I added sheer white ribbon to this one. Afterwards, the other one just seemed too plain to me...I think I like it better with the ribbon.

Here's an angle shot to show you the dimension of the card.
Thanks for stoppin' by! :)

Saturday, May 9, 2009

Tumbled Tile Coasters


I have some Tumbled Tile Coasters to share with you tonight. I made this set for my Mum to go with her Mother's Day gift. I scooped the idea for these tile from a gorgeous set that Gina Krupsky of Gina K Designs did and posted on Stamp TV. You can see her tiles here. She's also done up a wonderful video tutorial on how to make these tile coasters.


I loved the butterfly theme idea (imagine that! lol) and I paired another sentiment with it to use as a background. I stamped the sentiment repeatedly over the tile to fill it up and then used a fine grit sandpaper to sand off most of it to give it a muted look. This way it makes the butterfly stand out more. The sentiment reads:

Believe in your dreams and
you can accomplish anything
Congratulations

I bought this stamp today from a lss, but it only came in a ziploc baggie and it's unmounted, so I don't actually know who makes this stamp. I did a quick web search, but with no luck. If you're reading this and know who makes this stamp, could you please let me know. :) I actually cut the congratulations off the bottom of the stamp, since I didn't want to worry about inking it up by mistake and getting it on my coaster. If I want to use the whole sentiment together later, I can still do that by piecing it back together on my acrylic block.

Here's the set of four coasters together.

Here's the self-adhesive cork that I use on the backs of my tiles to protect the table that they're being used on. I buy these at the dollar store. They come in a pack of 20 and they work great.

Well, I had better call it a day, my girls have something planned for me for the morning. I can't wait! Happy Mother's Day to all the Mom's out there. Hope you all have a special day. :)

Thanks for stoppin' by! :)

Supplies:
Stamps: Butterfly - I0106 (Magenta), Believe in your dreams and you can accomplish anything Congratulations

Ink: Jet Black, Pumpkin and Sunflower Yellow (StazOn)

Tools: Ivory Tumbled Tiles (Home Depot), Sandpaper, Sponge Dauber (SU), facecloth to wipe off sanding dust

Embellishments: 1/2" round self-adhesive cork

Wednesday, May 6, 2009

A sad day

I had to take my cat, Lynux, to the vet this afternoon as she's been sick and I ended up having to put her down. An extremely sad day as I've had her for 10 years. We got her when she was just 6 weeks old and she was like one of the family. I know she's at peace now and she's not in pain anymore. We'll certainly miss her. :(

Oh, sweet Lynux...